Create your first event
Four short steps, from the name to the tickets. Everything can be changed afterwards, in the event's tabs.
The event form has four steps: Basics, Date and place, Tickets and Review. On the right, How participants will see it previews the card participants will see. Your event is saved as a draft as you go (Draft saved automatically), so you can stop and come back to it from Events.
Before you start
Section titled “Before you start”- Paid tickets: connect Stripe first, or at the same time. You can prepare the event before Stripe is ready, but paid tickets can only be sold once it is.
- A cover picture: a photo or poster, ideally 1920 × 1080 px or larger.
Owners and editors can create events; viewers can’t.
-
In your admin, choose New event on the dashboard, or Events › New event.
-
Basics
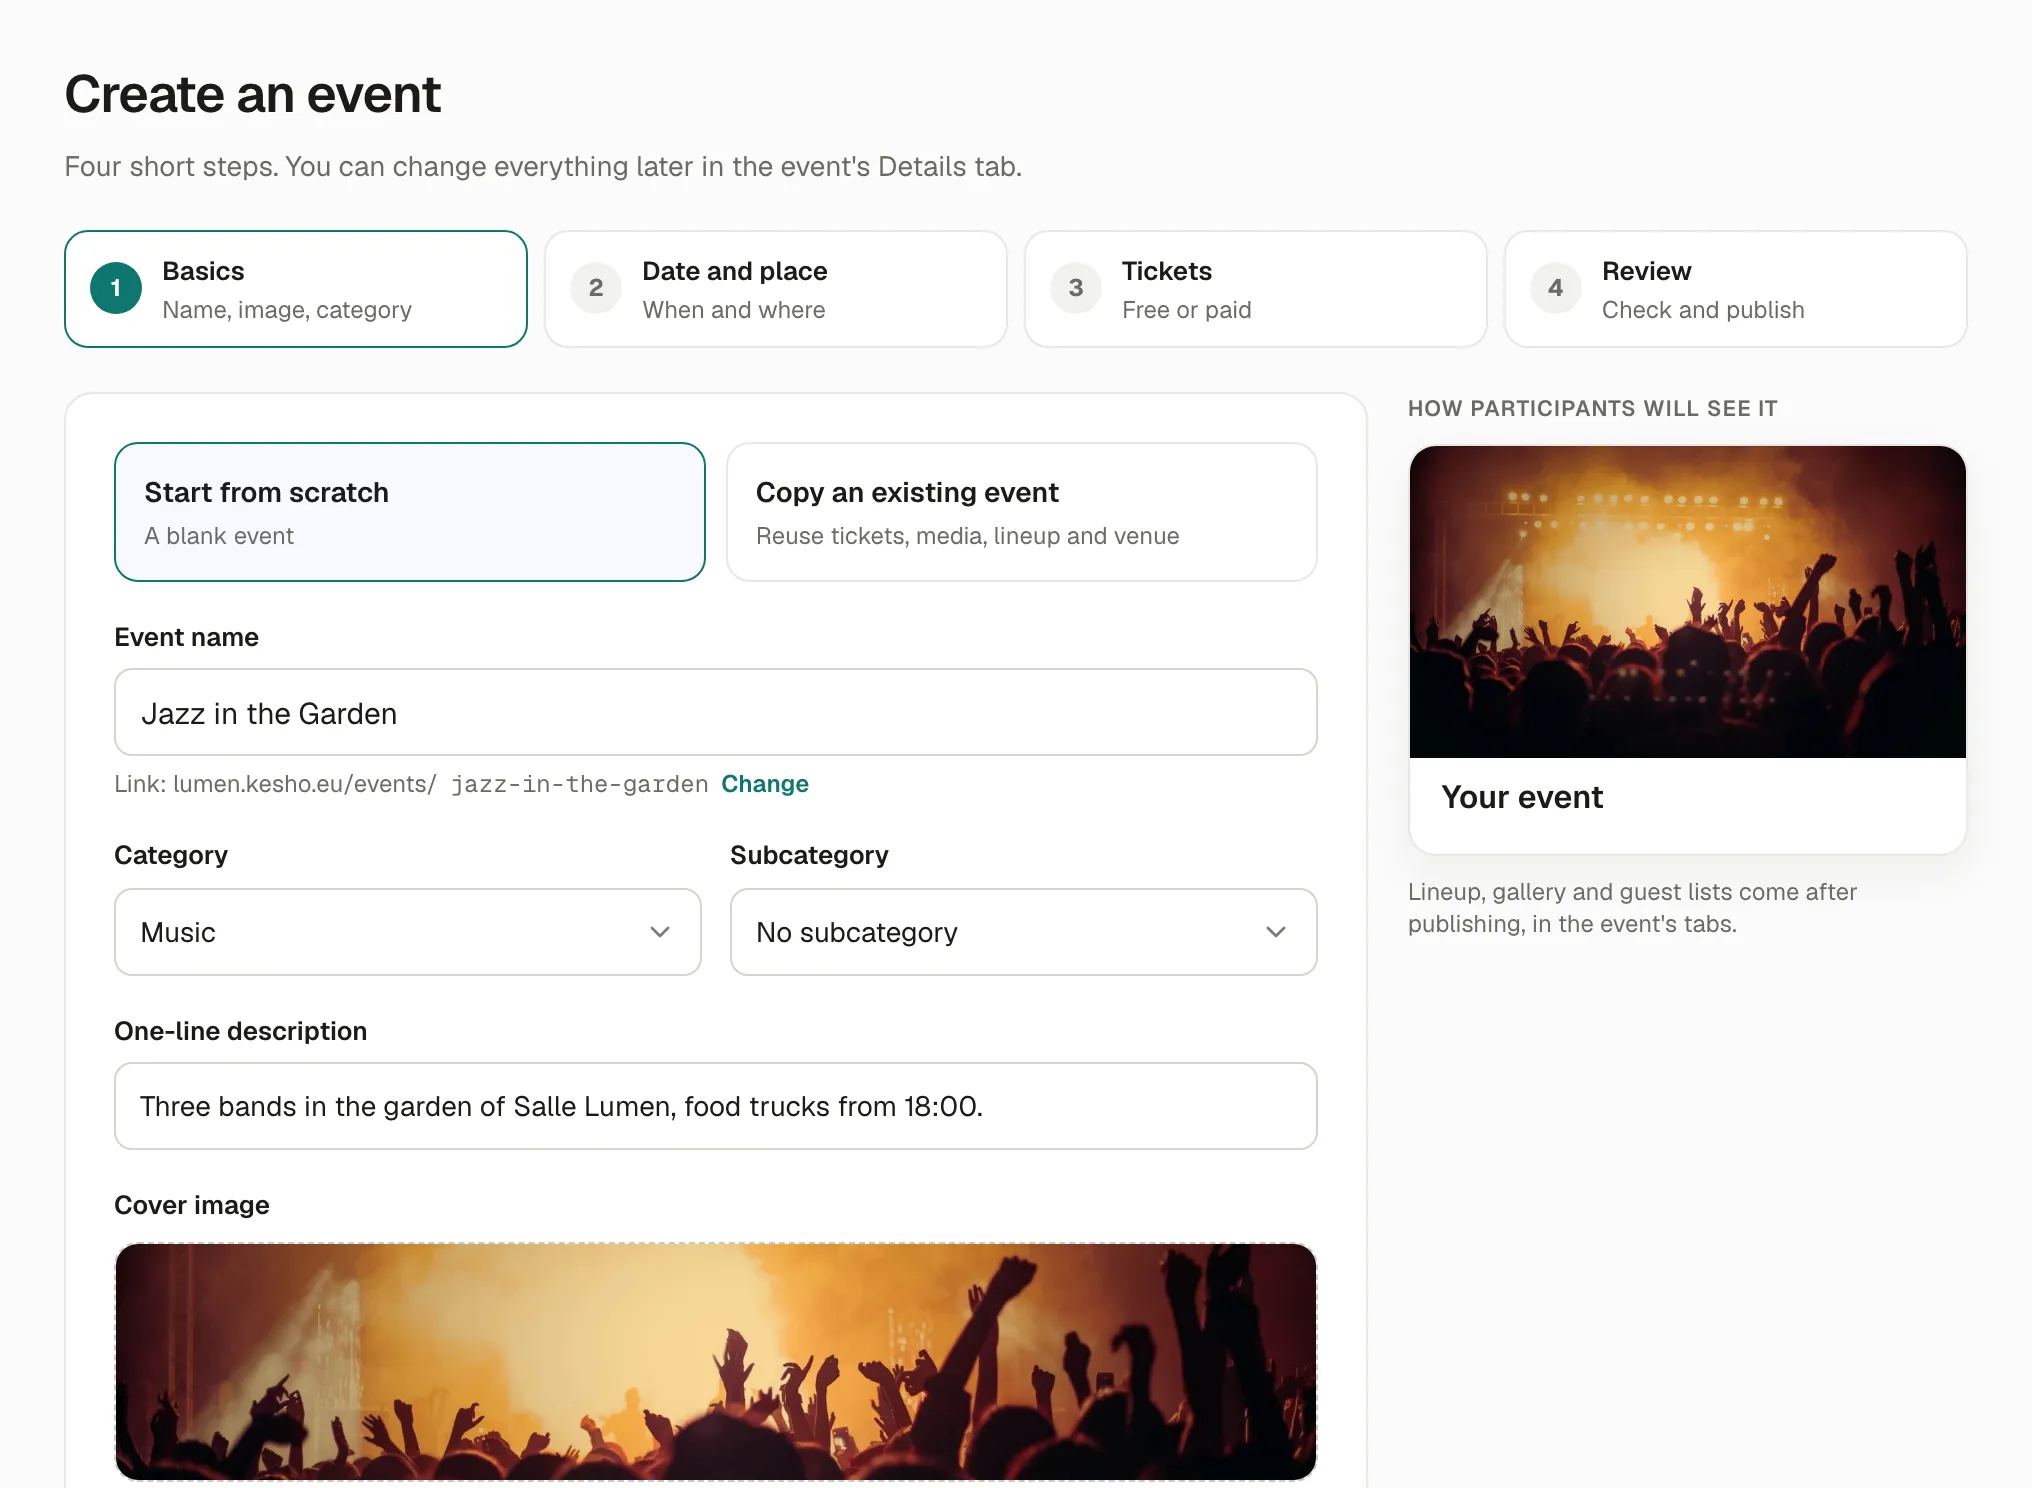
- Start from scratch, or Copy an existing event to reuse its tickets, media, lineup and venue.
- Event name. Its link is made from it: Change to choose another one (lowercase letters, numbers and hyphens).
- Category and Subcategory: where your event is listed on the marketplace.
- One-line description: the sentence under the name on your page and on the marketplace. Needed to publish.
- Cover image: drop a picture or click to choose one. A window opens to frame it (see Your cover picture).
-
Date and place
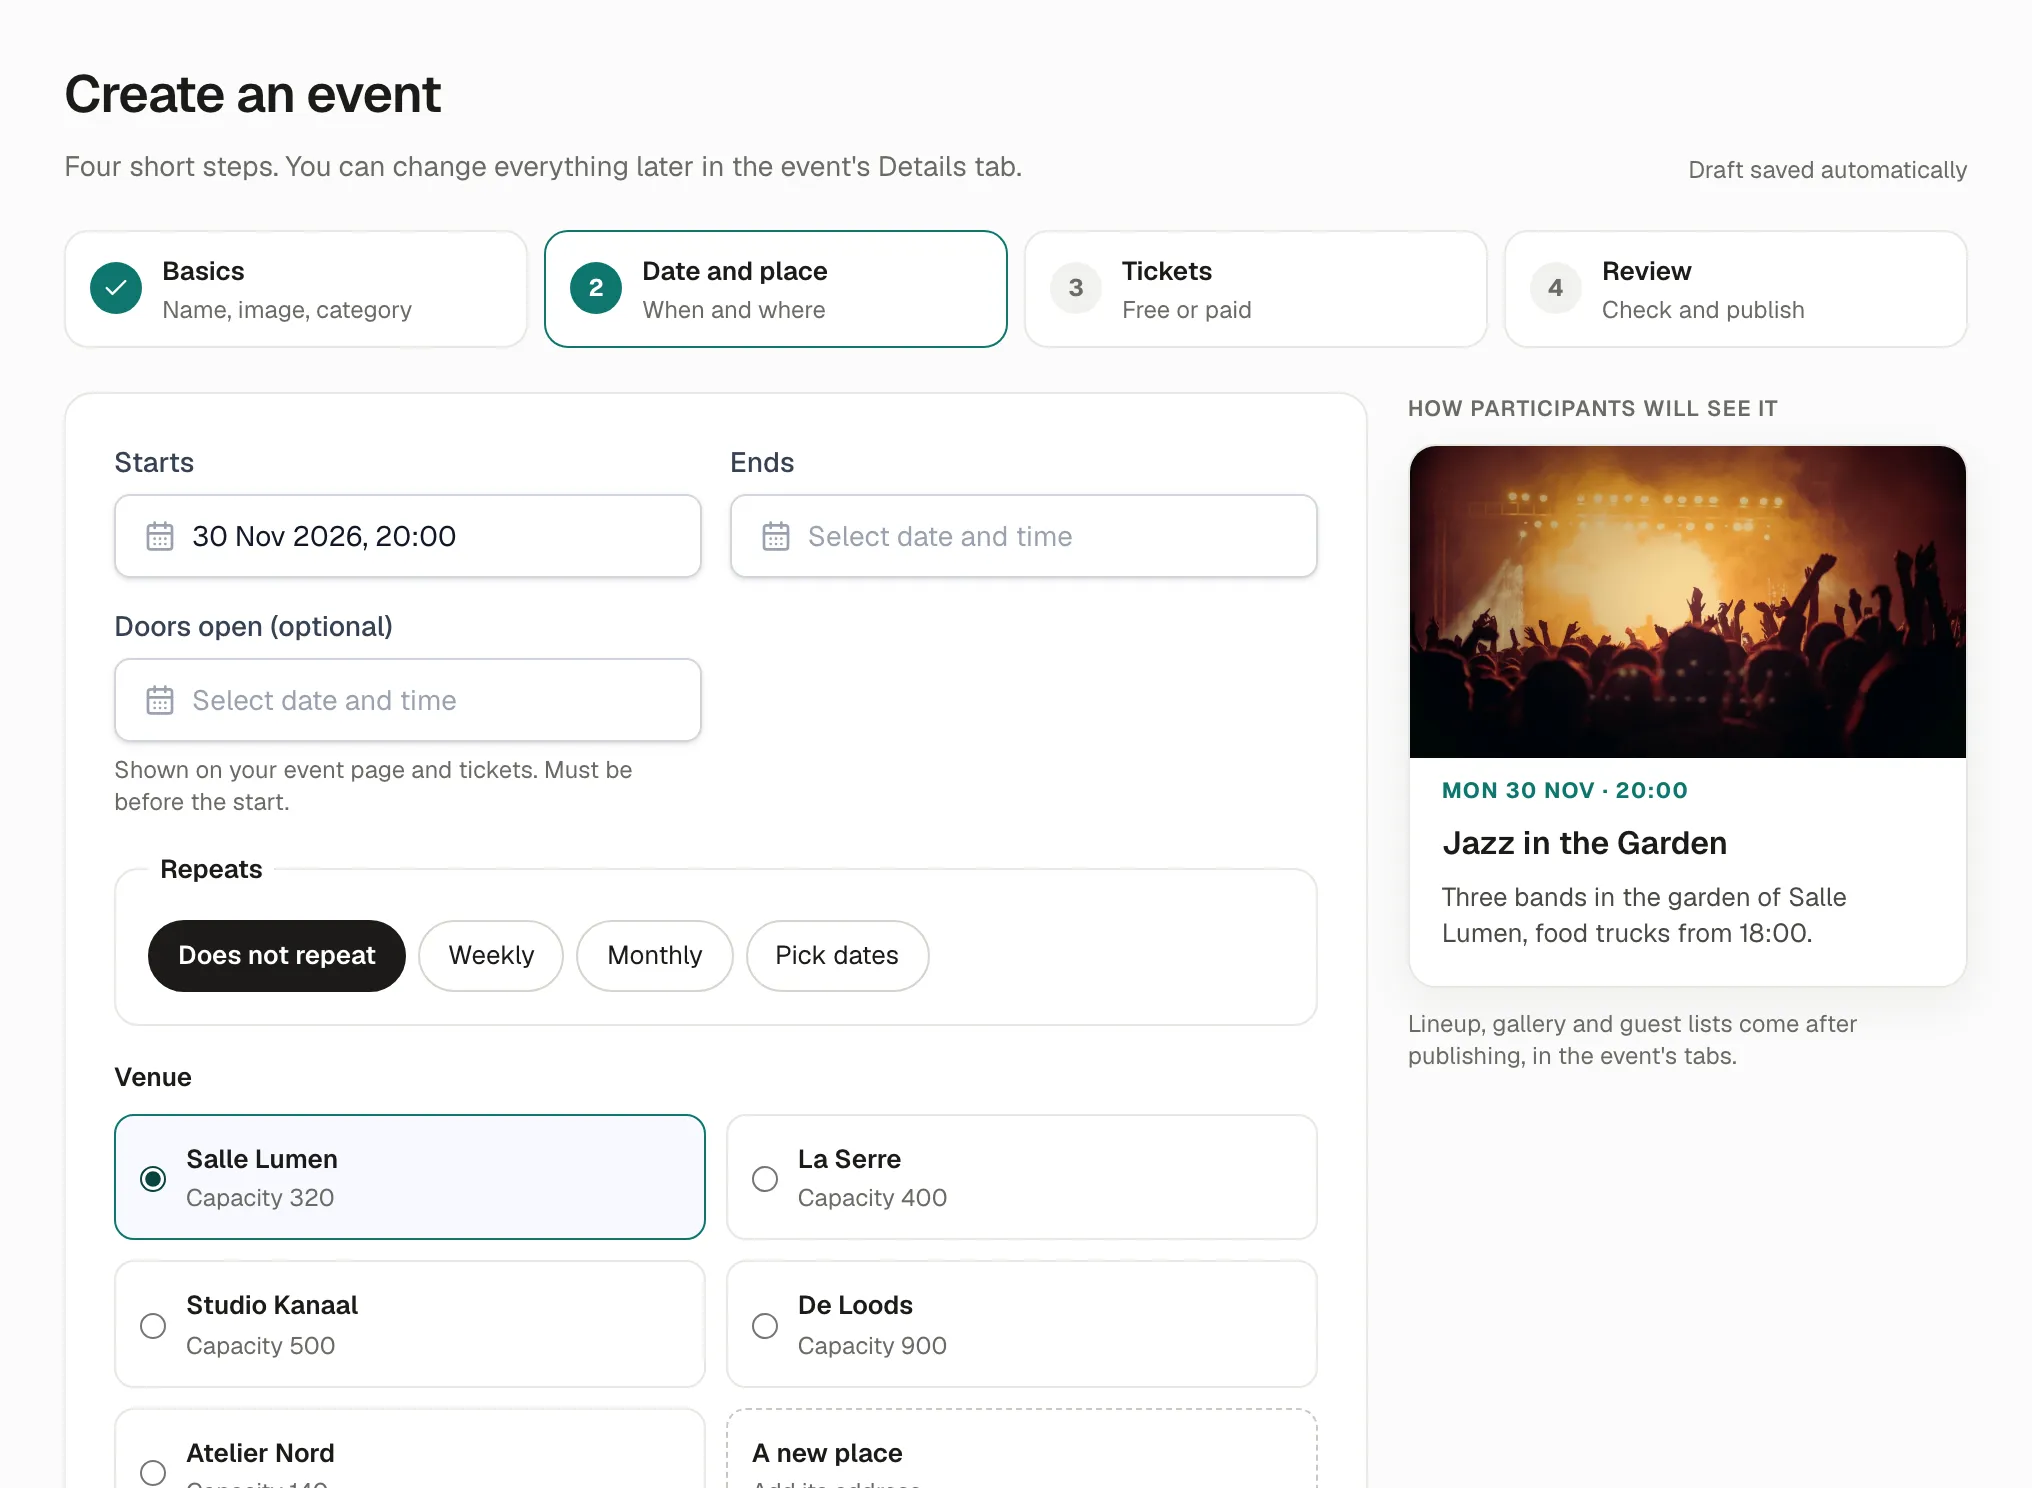
- Starts and Ends. Doors open is optional: it’s shown on your page and the tickets, and must be before the start, on the same day.
- Repeats: leave Does not repeat for a single event. Weekly, Monthly or Pick dates create a series: one event with several dates. See Series.
- Venue: choose one of your venues, or A new place to add it (see A new venue).
- How many people can come?: filled in from the venue’s capacity. Leave it empty for no limit beyond the tickets.
-
Tickets
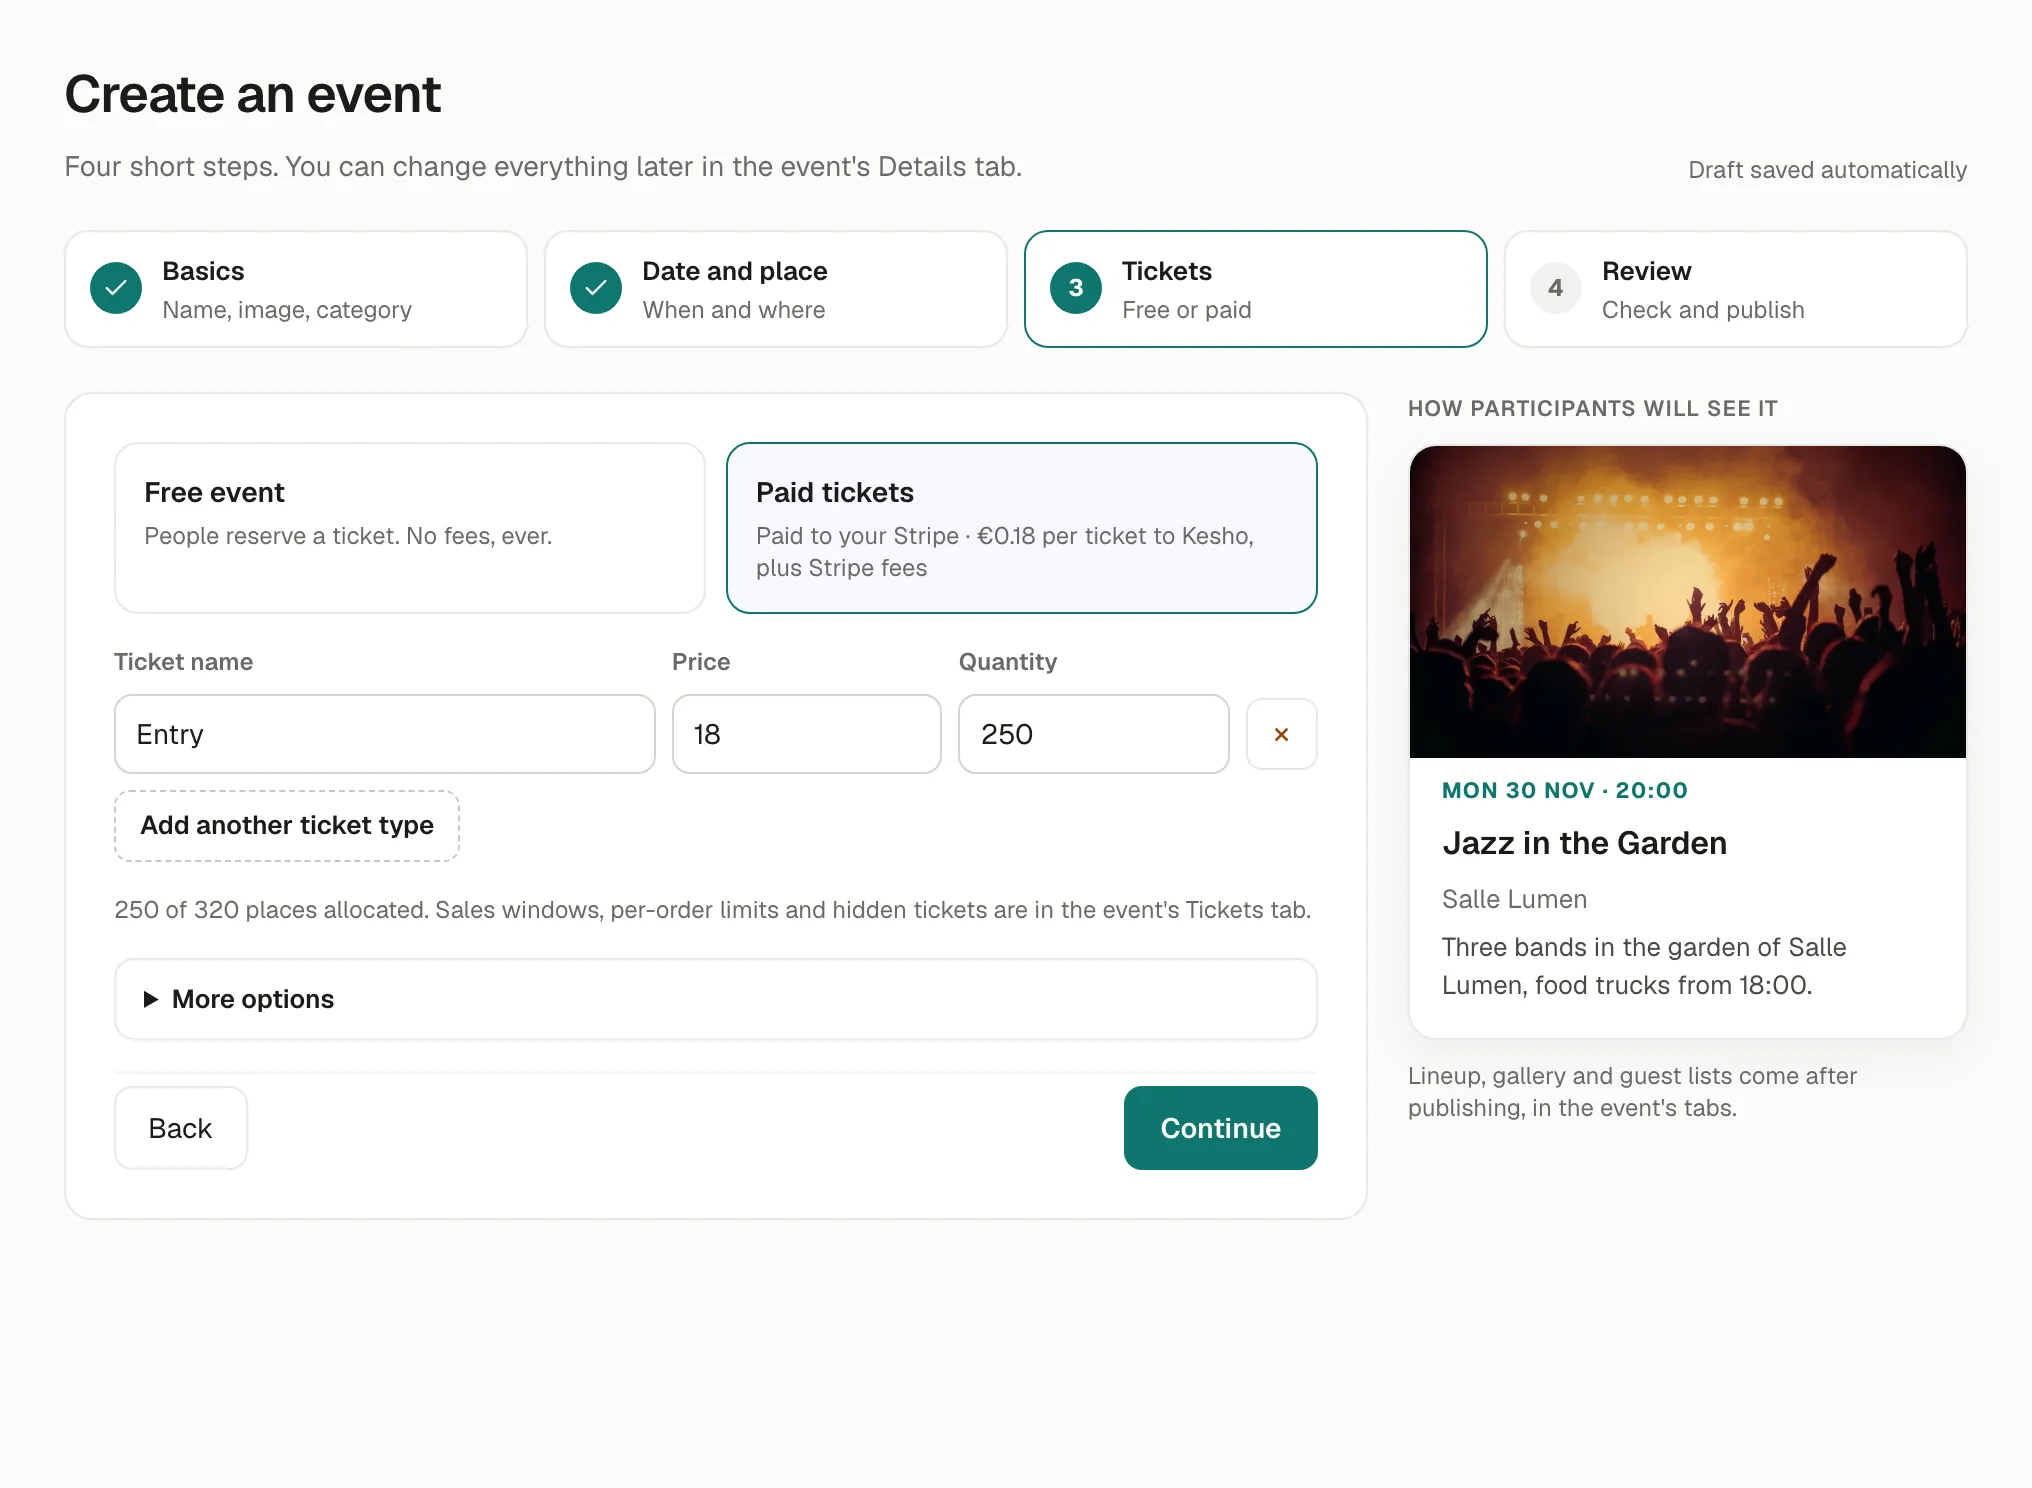
- Free event: people reserve a ticket. No fees, ever.
- Paid tickets: paid to your Stripe account. The line under it shows Kesho’s fee per ticket.
- For each ticket type: Ticket name, Price, Quantity. Add another ticket type for more (Standing and VIP, Early bird and Regular…).
The line under the tickets counts the places: they can’t add up to more than the event’s capacity. Sales windows, limits per order and hidden tickets come later, in the event’s Tickets tab.
-
Review
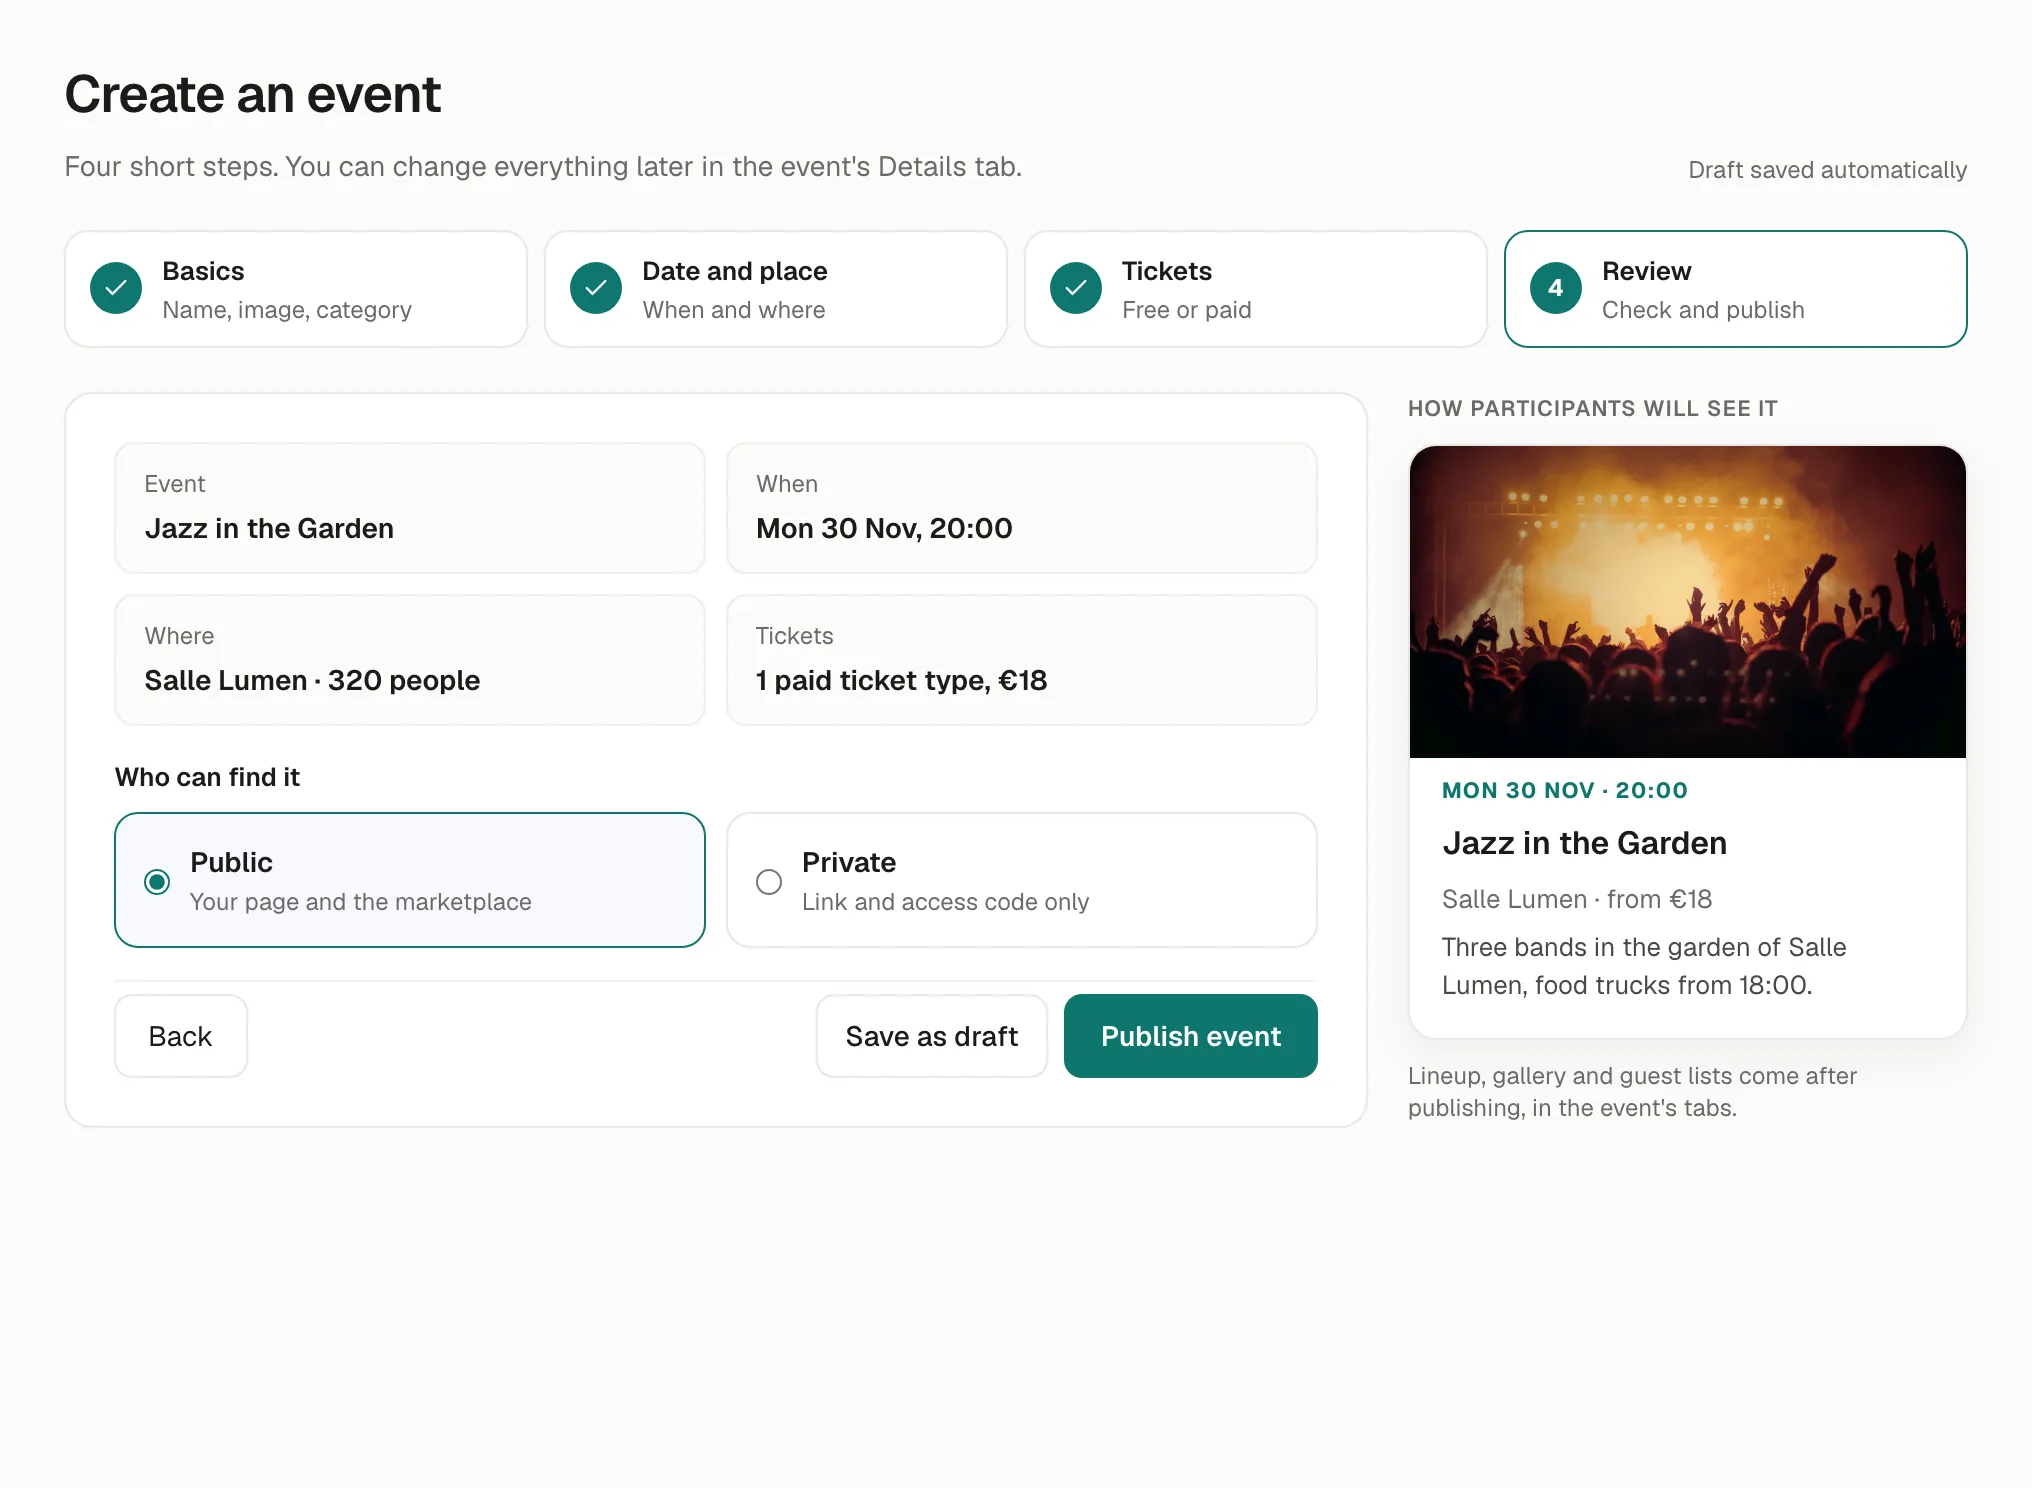
Check the summary, then choose Who can find it:
- Public: your page and the marketplace.
- Private: only people with the link and the access code. See Private events.
Choose Publish event, or Save as draft to publish later. What happens next is in Publish and share your event.
A new venue
Section titled “A new venue”The first time, you have no venues yet: choose A new place.
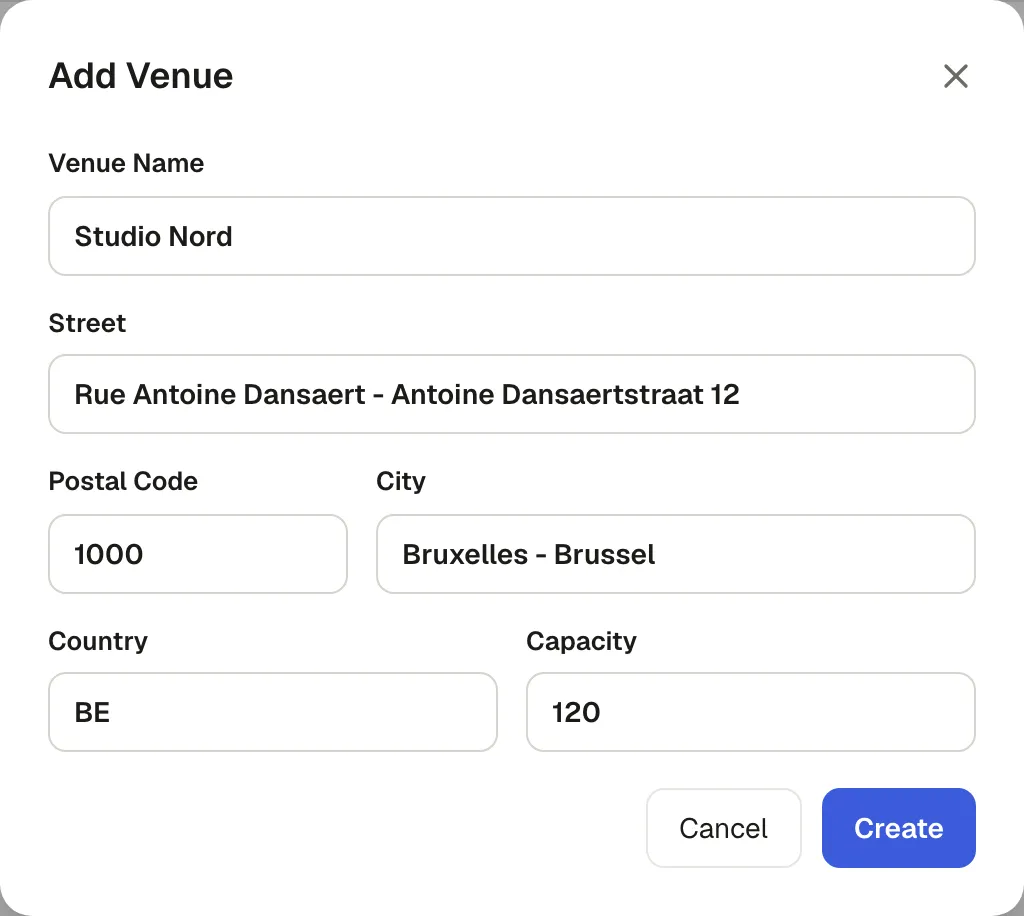
Type the street and pick one of the suggestions: it fills the postal code, city and country, and places the venue on the map of your event page. Give the venue a Venue Name and its Capacity, then Create. The venue is saved for your next events too, in Settings › Venues.
Your cover picture
Section titled “Your cover picture”When you choose a picture, Crop the picture opens. Drag the picture to frame the part to keep, and zoom with the slider. It’s saved at 1920 × 1080 px.
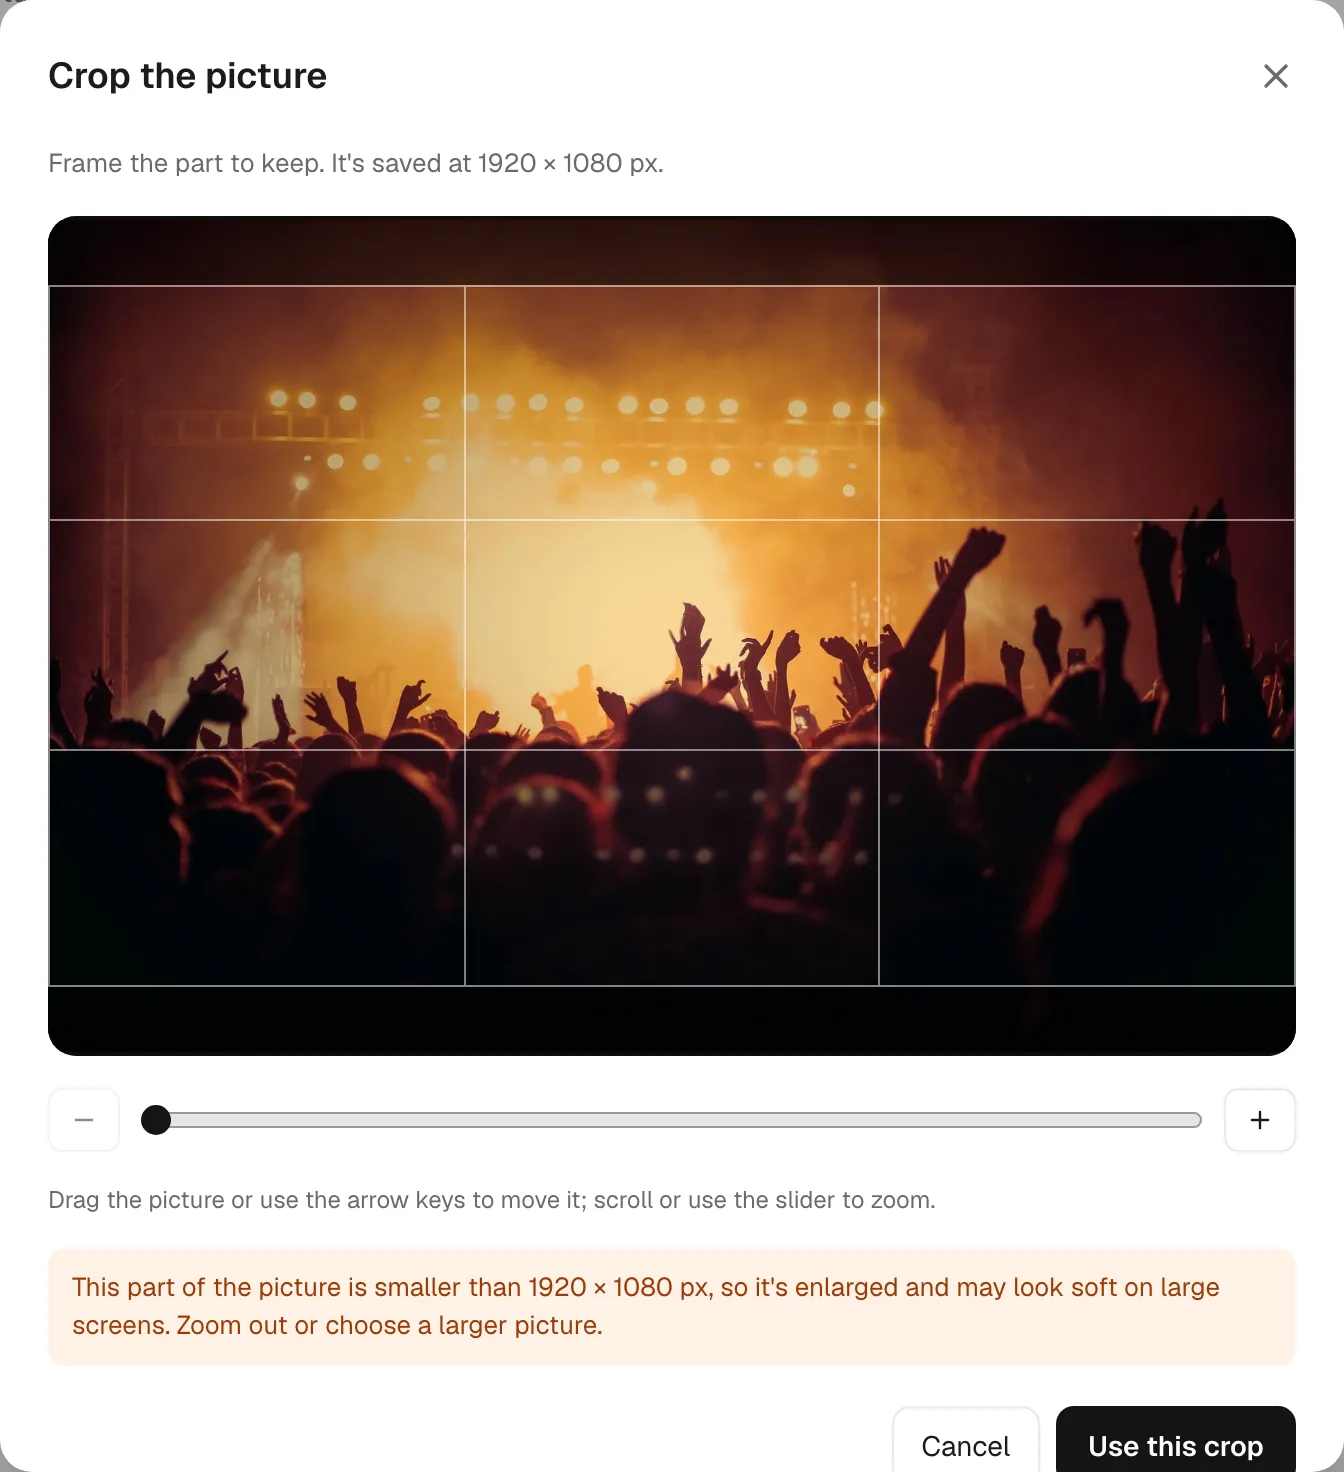
If the framed part is smaller than 1920 × 1080 px, a warning says it will be enlarged and may look soft on large screens. You can still use it; a larger picture looks better.
If something’s missing
Section titled “If something’s missing”Publish event stays greyed out while something is missing. The review step lists it, with a link to the step where you fix it:
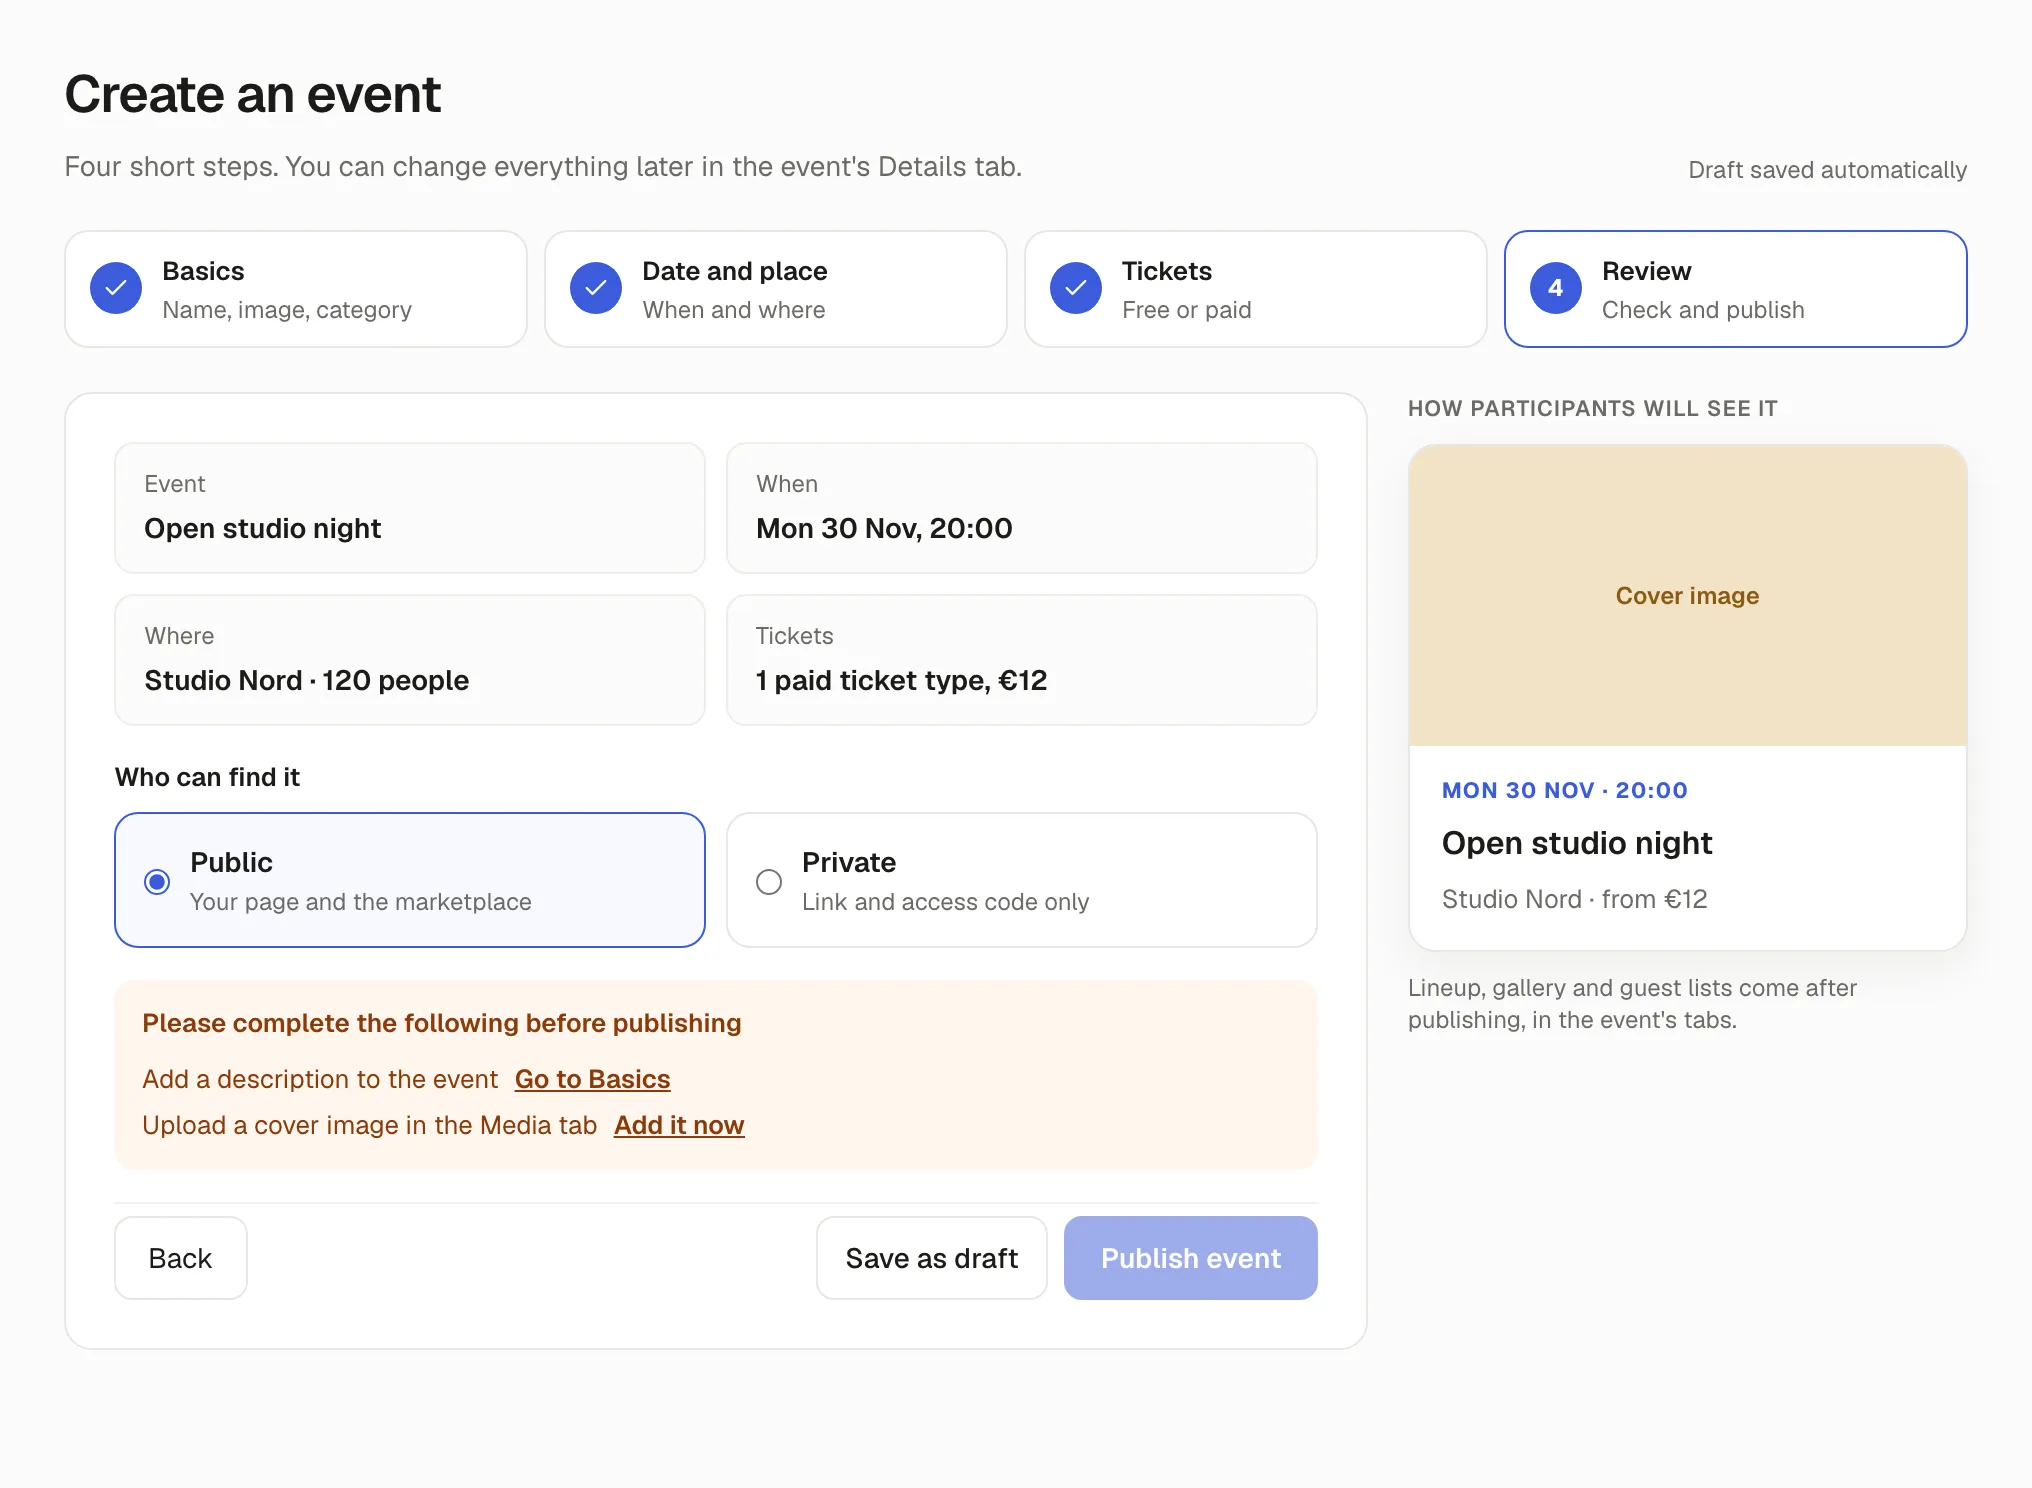
To publish, an event needs:
- a description (the One-line description);
- a venue;
- a cover picture;
- at least one ticket type;
- an end date that isn’t past.
With paid tickets, you also need to have said how you sell, once for all your events. If it’s the only thing missing, Publish event opens Before you sell paid tickets:
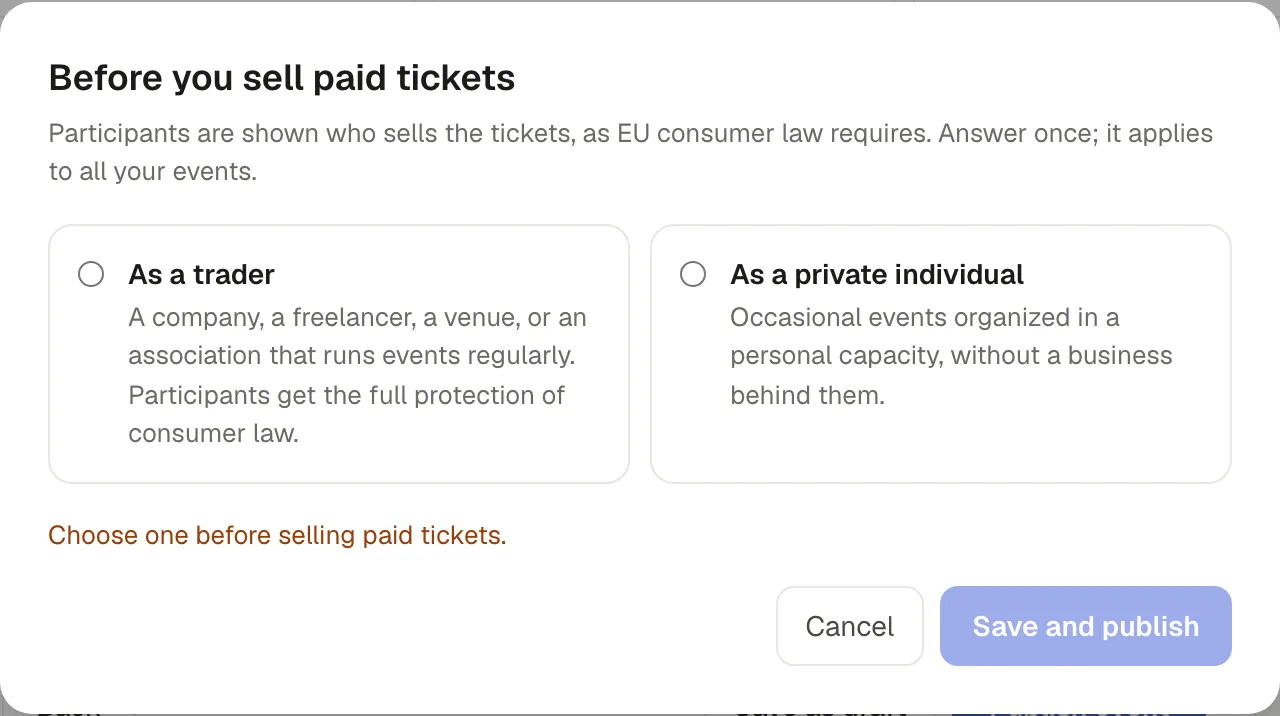
Choose As a trader (a company, a freelancer, a venue, or an association that runs events regularly) or As a private individual (occasional events, without a business behind them), complete what it asks, then Save and publish. See Legal details for what each choice means for participants.
Why it works this way
Section titled “Why it works this way”- The draft saves itself, so a closed tab doesn’t lose your work.
- The five requirements are what participants need to decide: what it is, where, when, what it looks like, and what they can buy.
- “How you sell” is required by EU consumer law: participants have to know whether they buy from a business, which changes their rights.
If something’s wrong
Section titled “If something’s wrong”| What you see | Why | What to do |
|---|---|---|
| This link is already used by another event | Another of your events has this link. | Change it: add the year or the city. |
| Use lowercase letters, numbers and hyphens | The link can’t have spaces, capitals or accents. | Type it again with only those characters. |
| The end must be after the start. | The end date or time is before the start. | Correct the end. For a night that ends after midnight, set the end on the next day. |
| Doors must open before the start, on the same day. | Doors are after the start, or on another day. | Set doors before the start, or leave them empty. |
| Add at least one ticket type. | You removed every ticket type. | Add one: even a free event needs a ticket type. |
| Each ticket type needs a name. / a quantity of at least 1. / a price above zero. | A ticket type is incomplete. A paid ticket can’t cost 0. | Fill it in. For a free ticket, choose Free event. |
| The ticket types would add up to more places than the event’s capacity. | The quantities add up to more than How many people can come?. | Lower a quantity, or raise the capacity. |
| Paid tickets go on sale once Stripe is connected. | Stripe isn’t connected yet. | You can publish the event; connect Stripe so paid tickets can be bought. |
| Publish event stays greyed out | Something on the list above is missing. | Follow the links in the review step. |
| The venue isn’t on the map of your event page | The street was typed without picking a suggestion. | In Settings › Venues, edit the venue and pick its address from the suggestions. |